Category: Projects

  • YBR125 Update… It’s done!

    YBR125 Update… It’s done!

    It has taken me way to long to get another update out on this so apologies, the quick update is that the YBR125 is completed and with it’s new owner. However getting it to that stage didn’t go to plan…

    Getting It Running

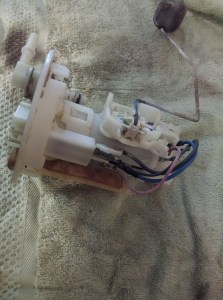
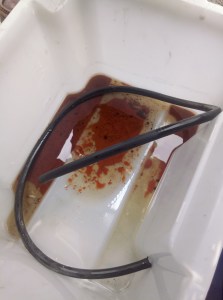
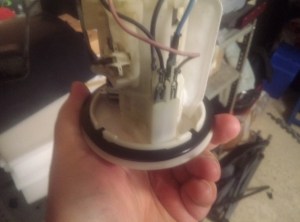
    Wind back to the start of April and I had the week off, one of my prime goals for that week was to get the YBR running and ready for an MOT. In my last update I had bolted the shiny bits on and had parts coming to confirm my diagnoses of the Fuel Pressure regulator, it turned out my diagnoses was correct. After draining the tank for what felt like the millionth time I took the fuel pressure regulator off of the donor pump and removed the rust filled one that was on the existing pump assembly. Bolted it all back together and filled it up with some fuel, it immediately sparked into life almost on the first stroke and rev’d cleanly unlike before.

    However all was not well, I immediately rolled it down the drive to test that it would go through the gears and thats when it tried to wheelie on me as I kicked it down into gear with the clutch in. The years of sitting had obviously not been kind to the clutch which was now seized.

    So i tried a couple of quick tricks first, getting the bike properly warm and the oil properly flowing then dumping it into gear. Laying the bike on it’s side for. few hours to try and let the oil soak and loosen up the clutch plates… both to no avail so I set to with probably the most major job I have done on the bike, replacing the clutch. At first it didn’t want to come apart with the kick start level and starter motor live bolt fighting me so I left it soaking in Plus Gas for 48 hours and came back to it.

    A gear puller I had picked up in between made light work of getting the kick start off and despite the starter motor live connection bolt being now made of toffee (the rubber cover acts as a nice water bowl for this to sit in) I managed to work it loose with some mole grips after removing the exhaust for better access. Which for the first time in my lifetime the exhaust head bolts came out as if they had just been put in, I can only assume it was the liberal Plus Gas and patience. Everything now out the way I was able to remove the side cover and slide it off, followed by unbolting the clutch springs. After which the clutch pack came out as one, the friction plates and metal plates all stuck together with rust.

    With them removed I decided it wasn’t worth cleaning them and putting them back in as the friction material was likely compromised and I didn’t want loads of small rusty particles flowing round the engine in the shared oil. A new Gecko set was ordered and a couple of days later with a new gasket and some minor swearing after sheering a bolt and having to drill it out and replace it was back together with a new fresh clutch.

    MOT Day

    Once some insurance and tax had been sorted I got an MOT booked and that is when I realised I was missing a few things I needed to put it back together, a little rifling through the spares draws later and some suitable bolts and fasteners were found to get it looking back like a bike.

    I had also after getting the clutch done managed to do a better job of refitting the screen, engine bars and fitted the new Chinese chain oiler which fits and works a treat. Unfortunately I didn’t get round to fitting the hand guards because they didn’t quite clear the levels or so I thought.

    Anyway it went in for the MOT, riding it up the step hill to the estate was fun and took me back to being a kid again. I laughed my ass off all the way up the hill… After Failing initially on headlight aim, the local garage are excellent and they just got on and corrected it for me for no charge and put it back through passing with two minor advisories. 1. corrosion on the front forks (I knew about this but it wasn’t effecting performance or leaking dangerously). 2. Bent front brake lever, it’s obvious when you look at it and explains why the hand guards wouldn’t fit but somehow my brain had just chalked it down to a weird shape lever…

    Finally it was ready to go to it’s new home, now I just had to get it there.

    New Home Day

    It’s new home in the New Forest is about 80 odd miles away from mine, so I made a day of it and gave the bike a proper shake down in the process. I started with a ride from High Wycombe to Winchester for 9AM to meet a biking buddy for breakfast, I actually got there decidedly early the bike not missing a beat and managing to carry my heft up to 55mph on the flat.

    YBR in the centre of Winchester

    Following breakfast it was on to meet another mate in Chandlers Ford and take a ride with him upto Portsdown hill on the back roads like we did when we were first biking as teenagers most nights… Then back down from Portsdown to the New Forest to pick up a tent before heading to it’s final destination.

    Surprisingly capable bike luggage wise..

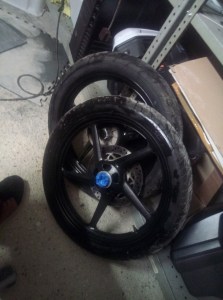
    Just before this my mate had point out the tyres looked a little low, I hadn’t checked them as they had new rubber and had been inflated when fitted. Although they weren’t dangerously low they were not at the recommended pressure for the load so I cranked them up to the correct pressures. What a difference, the bike suddenly was more eager with my weight on hitting 65MPH on the flat and no doubt capable of reaching 70MPH with a longer run.

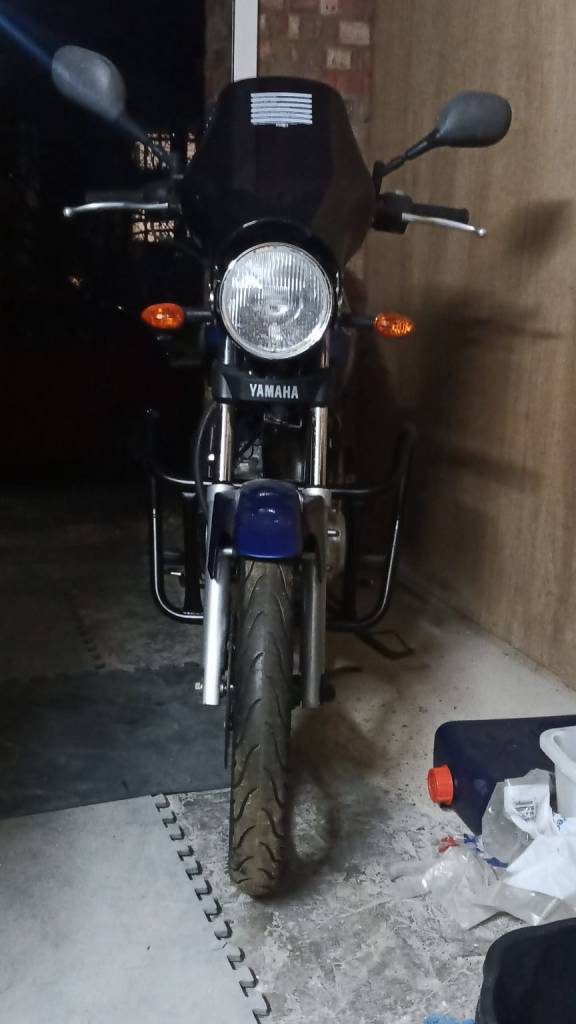
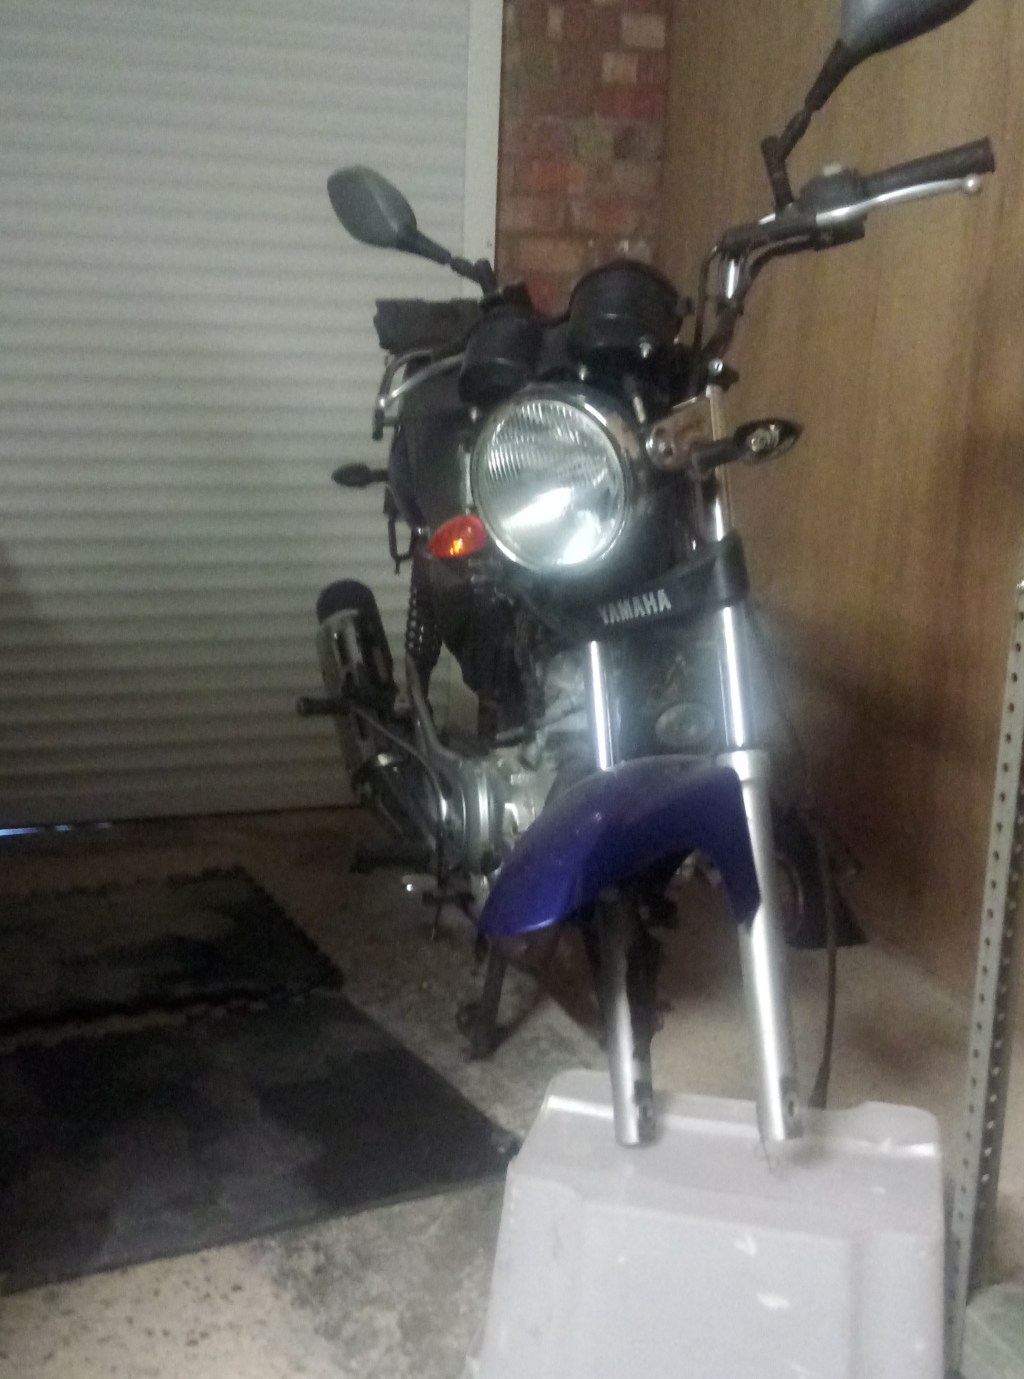
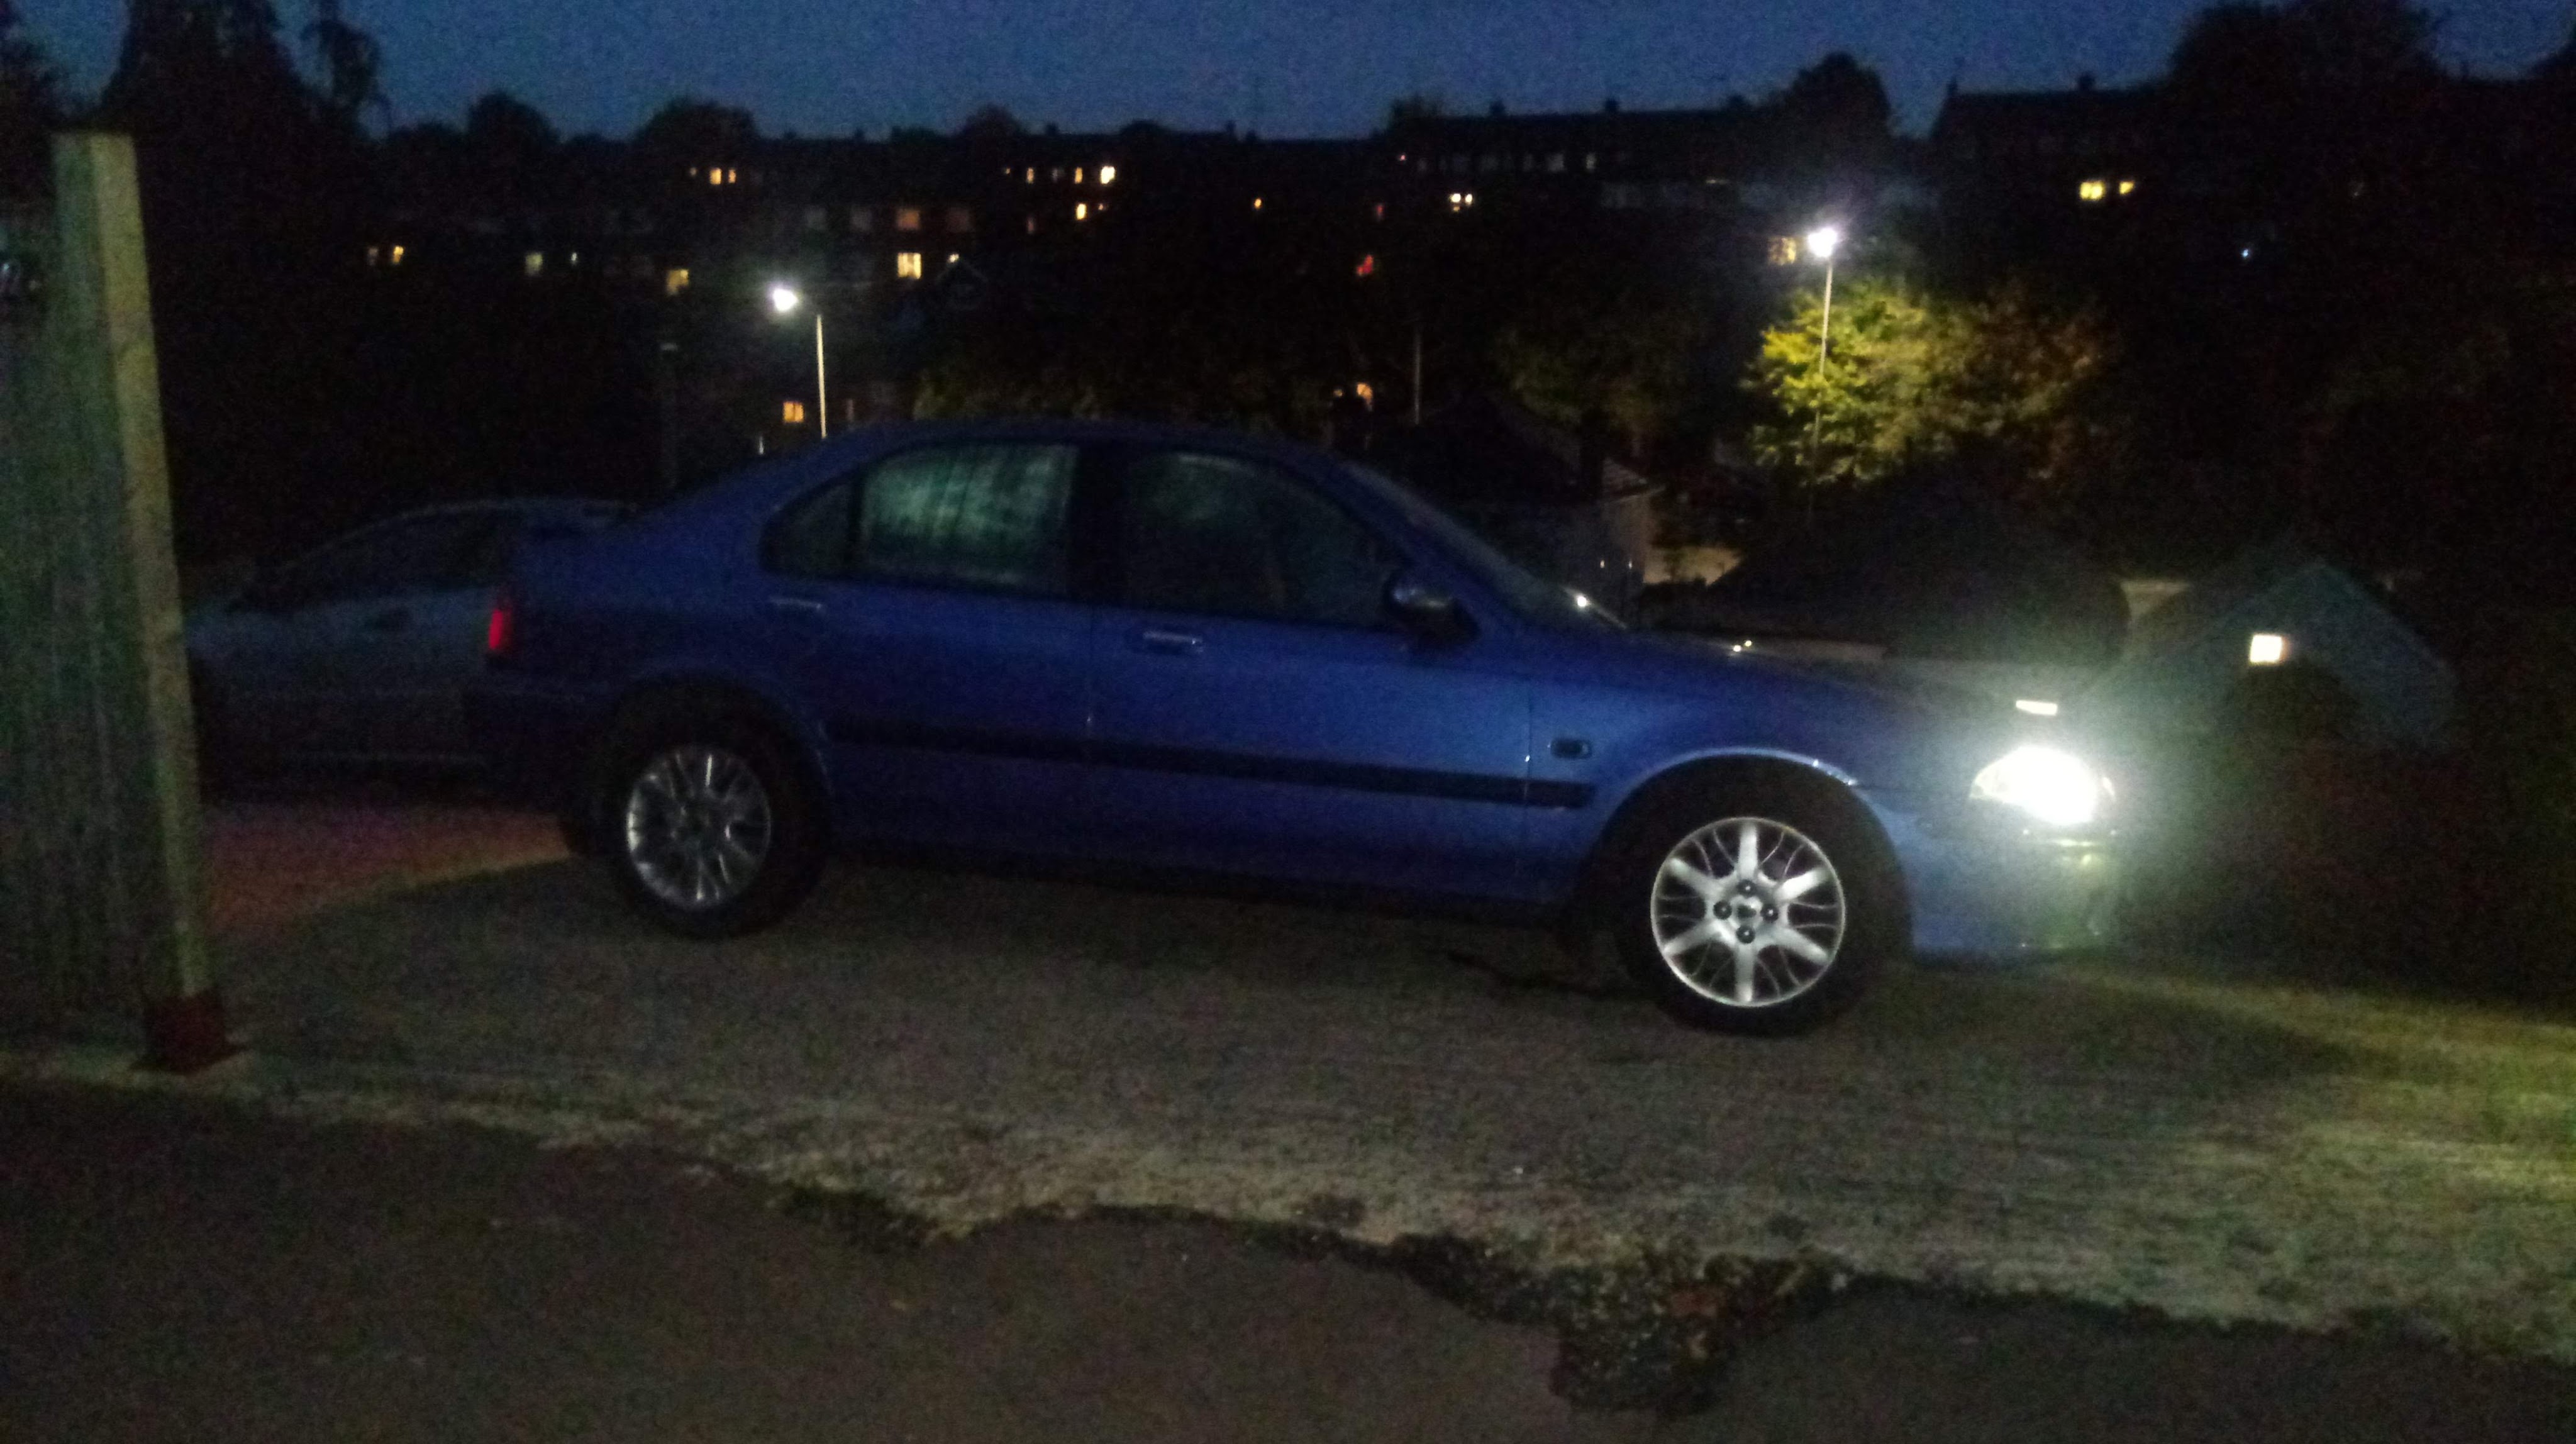
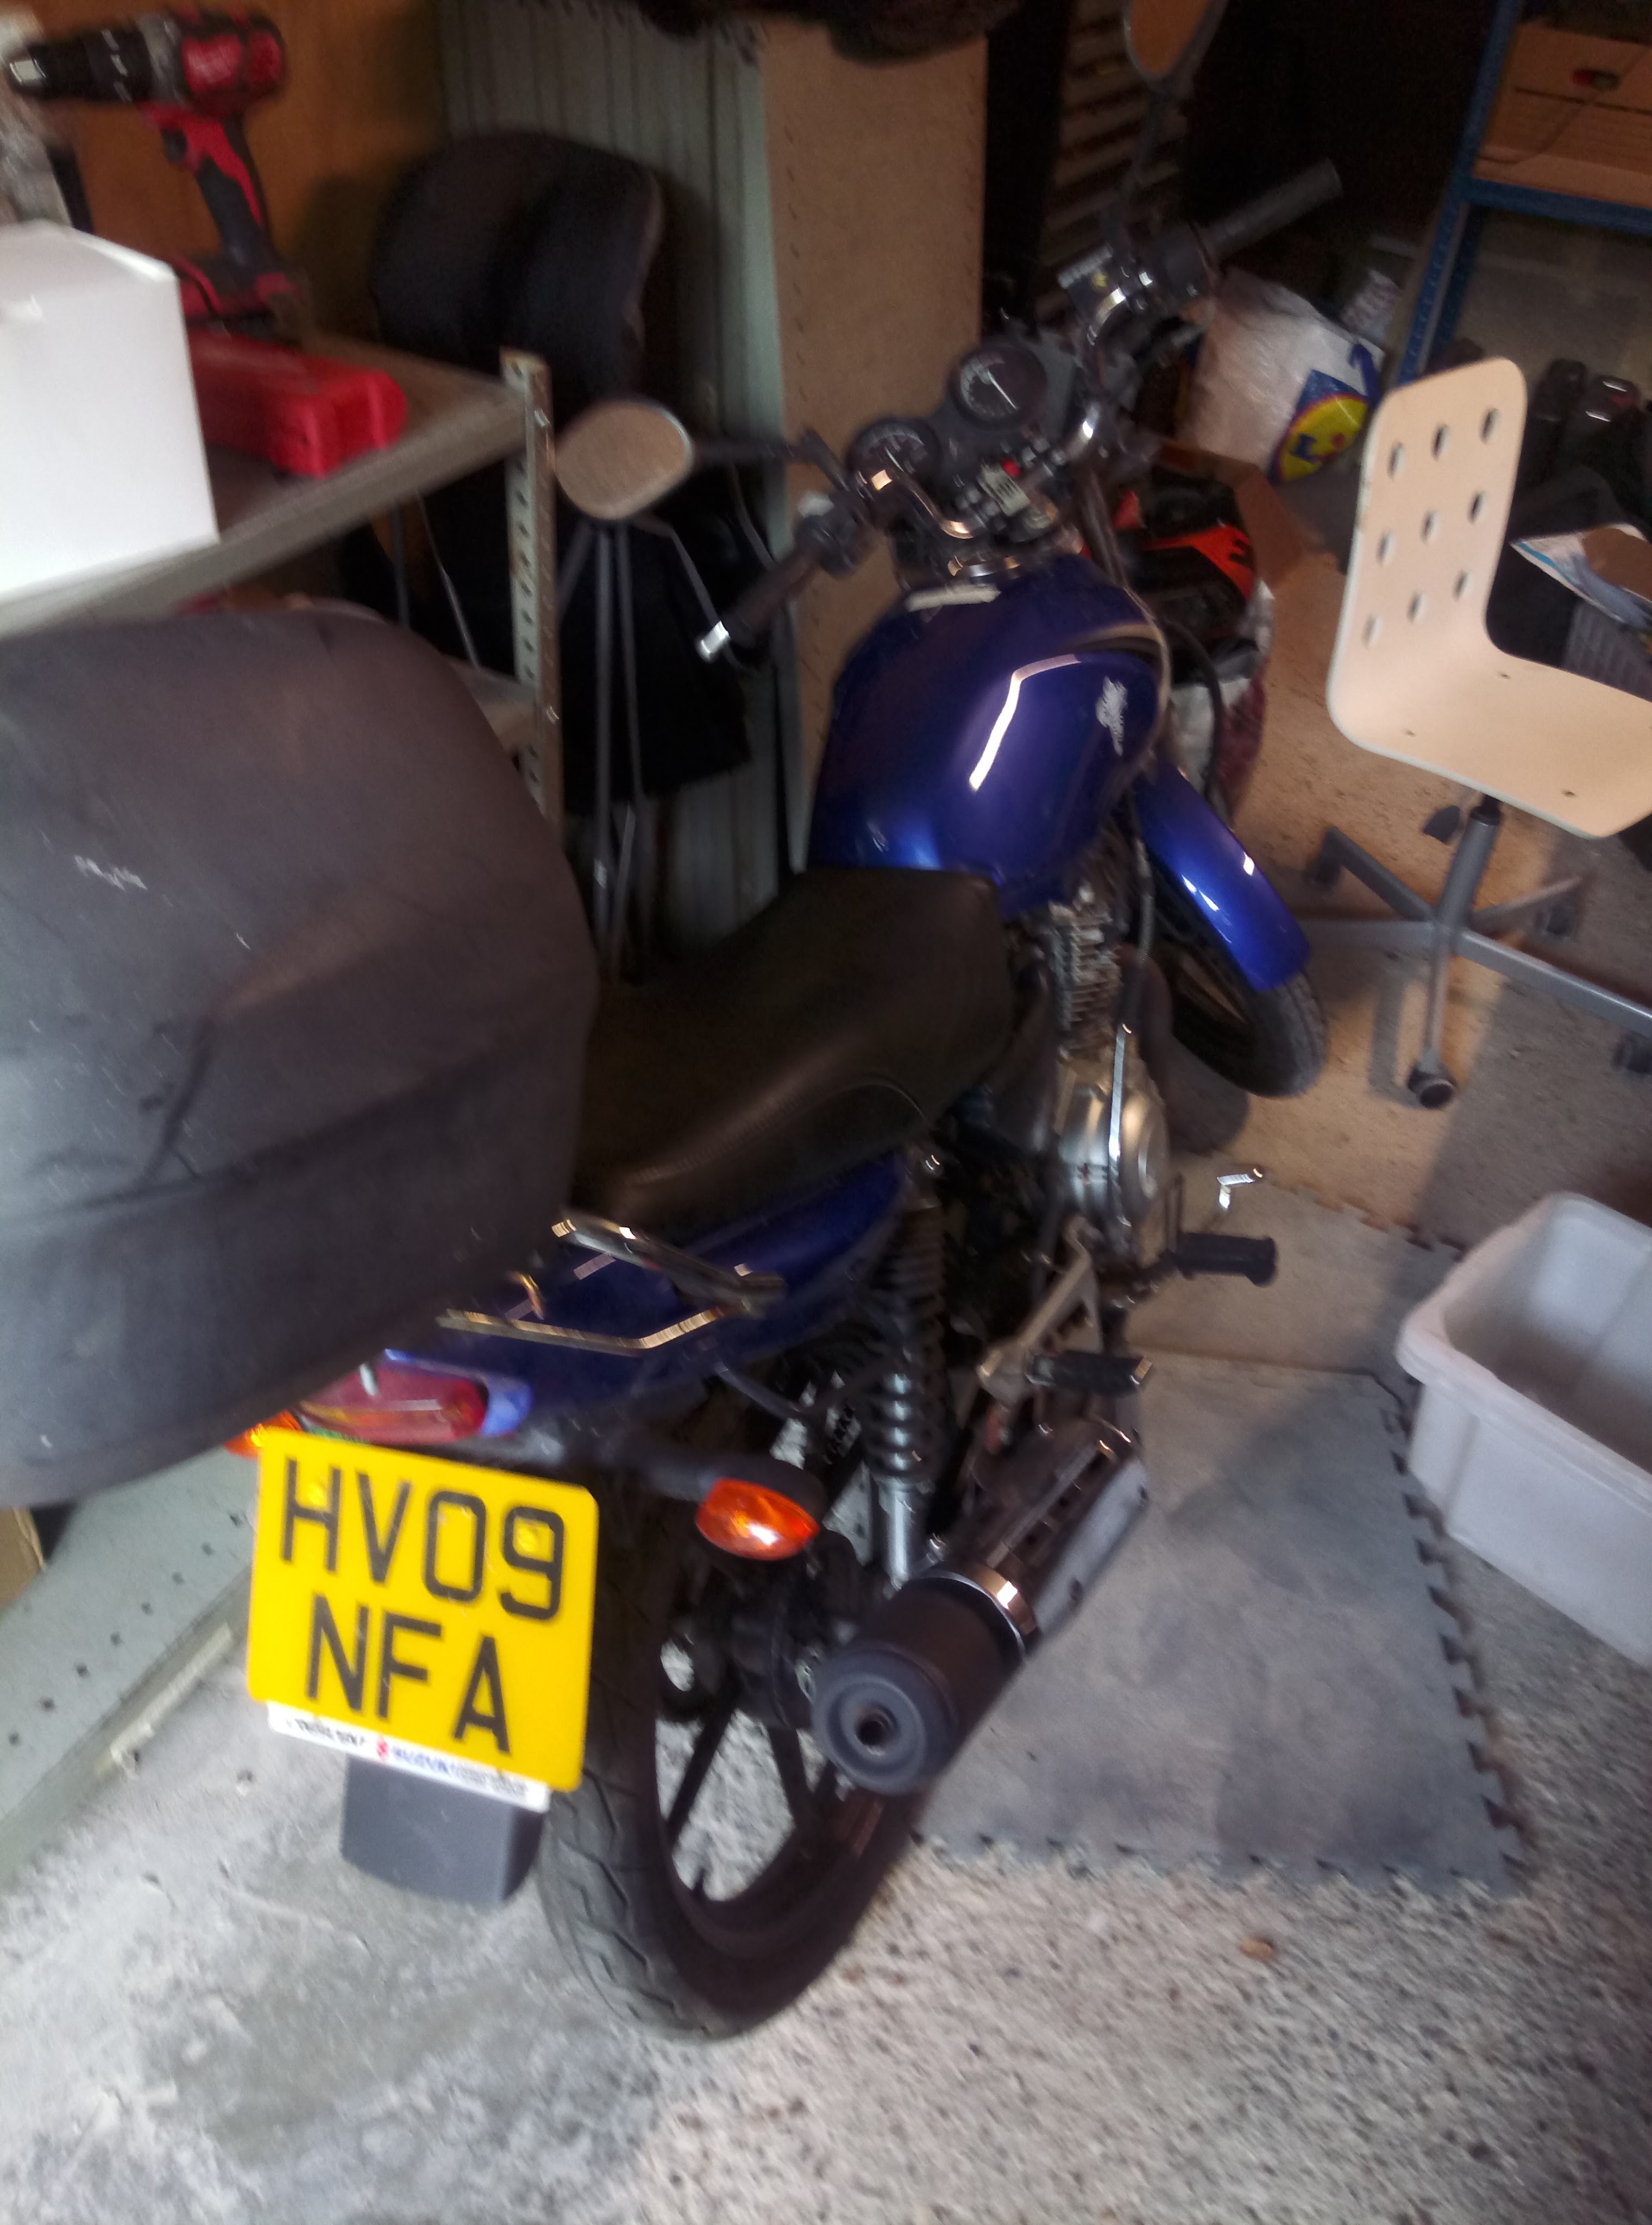
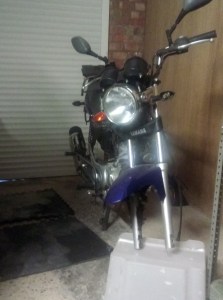
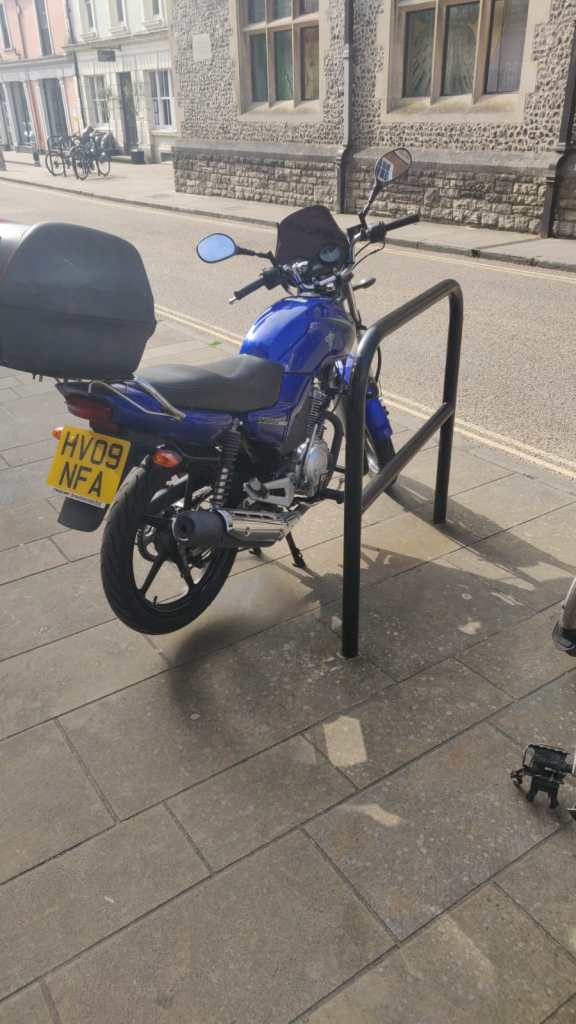
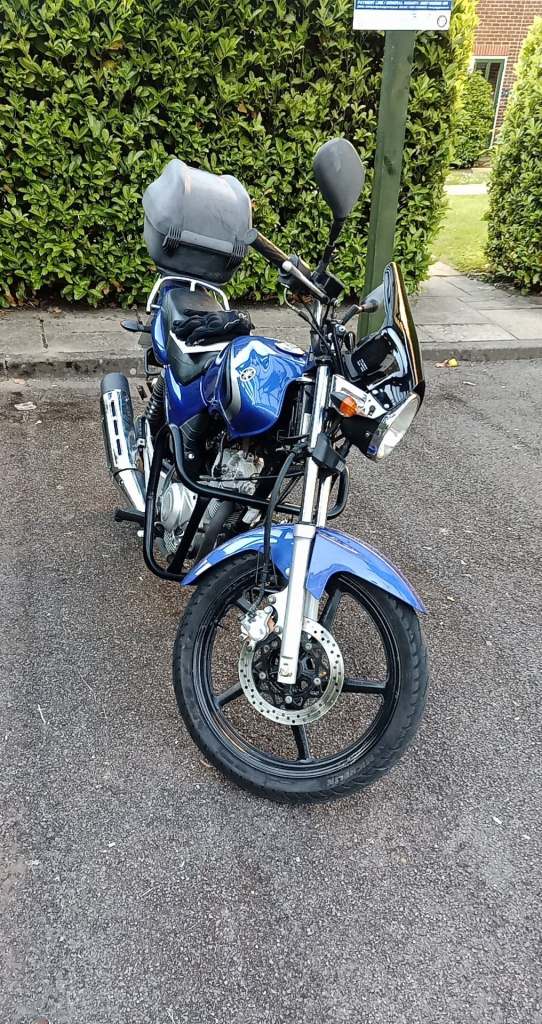
    The new owner was most pleased with her new bike and putting her CBT to practice, here are some photo’s I took before the ride down. There are a couple of minor finishing touches that needed doing, the L plates needed fitting, the under tank plastic air trim things needed fitting and the hand guards that are still in my garage will be fitted at a later date after the level has been straightened.

    YBR before the long ride down south…

    Overall the bike did about 150 miles that day with my rather heavy body on and some bits in the top box / on the rear seat for sections it didn’t miss a beat and the chain oiler worked a charm. I am looking forward to joining it and it’s new owner on some rides hopefully in the not to distant future.

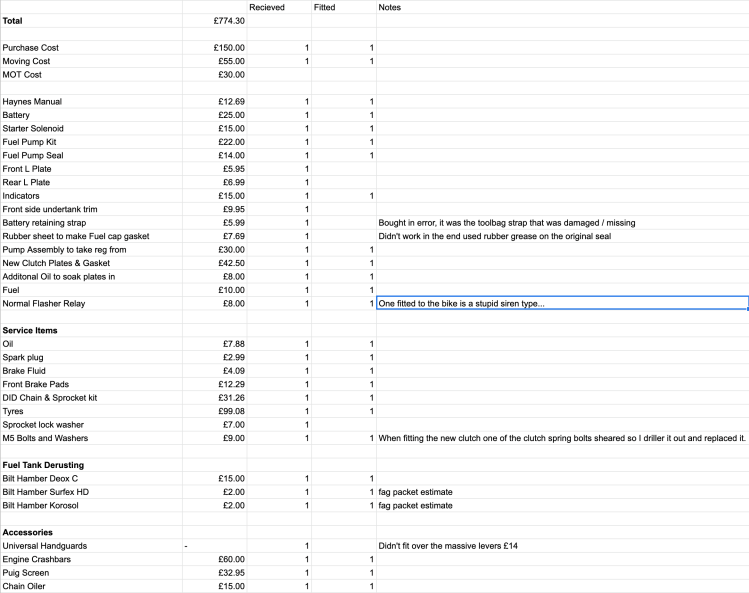
    What did it cost in the end…

    With purchasing for £150 I was hopeful that it would work out around the £500 on the road but with the extra issues and sprinkling a few accessories for better comfort and for the bikes long term betterment it came out at just under £800 and thats not accounting for fuel to get it down to it’s new home.

    Overall this is still a good preposition as it has new brakes, tyres, chain and sprocket. Thus everything it should need general wear and tear wise for the next couple of years is covered. With a clean and a few finishing touches I reckon I could easily sell this for £900 and more likely get 1100-1300 for it on the current market. So although I was never in it for the profit, it at least is never going to be a loss if I were to need to sell it. However it just goes to show that even a 125 with cheap parts and that has low miles and should be a gem of a project can still rapidly rack up a hefty parts bill. If I had paid more than £150 I would be in the red…

  • YBR125 Project Update

    YBR125 Project Update

    Whilst we have been in lockdown this project has been a bit stuck, before Christmas I dropped some fuel down to my dad in my 10L jerry can. Unfortunately to make the next bit of progress on getting it running properly I needed that jerry can, and with shipping difficulties and expenses and not being able to get another identical 10l jerry can for a reasonable price I figured I would just wait until I could travel to pick it up.

    Note I am not normally attached to particular jerry cans but the design of this one is particularly good and the rest of the standard stuff on offer was off the classic leaky and loose the seal design. Or really expensive and metal which is overkill for my usecase.

    However I now have the jerry can and my patience has paid off as whilst I was waiting I managed to get a deal on a full working pump assembly, managing to secure it for £30 on eBay. If you read the last update back at Christmas you will know that a full pump assembly from Yamaha is £270 and normally known working units seem to fetch £70-150. There was another option that I hadn’t come across before, it seems a seller in Europe is offering aftermarket regulators of varying pressures. These posted seem to come to about £30 however there is nothing in the manual or documentation I can find to confirm what the correct pressure should be for my model so I felt it was not worth the risk. It would have also added another un-necesarry variable to any further diagnostics if I have got anything wrong so far.

    Whilst the project was stalled I decided to do what I normally tell other to avoid, that’s right I bought some shiny bolt on parts for it and put a little more into it. Despite it not running… Although they won’t massively improve the resale value later on they are nice touches to make it a more comfortable bike. Thus I have / am in the process of adding

    The crashbars and screen arrived last week so I cracked on fitting them, the screen looks and fits alright though I would say it is a little big around the radius of the headlight curve.

    The crashbars although relatively easy to fit did require a little modification to the bike, they pick up on two locations. The first and most structurally important is a bolt that runs through the frame and engine underneath the front edge. You remove it from the frame and engine slide the crash bars in and bolt it back in, really simple. The second pick up point is a done using a u-bolt that goes round the down tube at the front that comes down from the steering head to the base of the engine. The problem is that the location this lines up with is directly inline with the location of the horn and it’s mounting plate that is welded onto the down tube.

    I managed to drop the u-clamp down a little and get it under the welded bracket on the down tube, however the horn itself then fowls. I got round this by removing the horn, pulling the cable connected to it released enough slake to enable me to move the horn. I drilled out the hole on the metal straight section that the horn is bolted to so that I could get it over the end of the u-bolt. This way as I tightened the nuts on the u-bolts I put the horn mount on before the nut, this places the horn down from the top of the crash bar. Luckily the cable just reaches. It was an easy fix and good enough for this type of bike. If it were a bigger bike or nicer bike I might consider making up a new different style of mounting bracket that picks up on the original lug on the frame.

    It’s amazing how much this transforms the look for the bike, it just makes it look more stable and secure. The crash bars and hand guards (when fitted) will make a big difference if the bike is dropped, they along with the screen will also keep the cold off and allow the bike to be even more practical.

    The handguards, chain oiler and pump assembly arrived this week so I intend to get them fitted over this weekend… finger crossed the bike then starts and keeps running, bar replacing the lock washer on the rear sprocket and doing an oil change the bike should be ready to get an MOT and ride just in time for summer.

  • A little look at Tyres…

    A little look at Tyres…

    Earlier this week I took a look at my facebook notifications and the latest posts in the Kawasaki Versys 1000 forums and saw a post that is all to familiar, “What tyre should I go with X or Y”. I would say about once every two weeks someone is posting asking about tyres, this gave me an idea that maybe it would be worth doing a simple survey and getting a look at what the people are running, paying and how long they are lasting.

    I am still likely to get a few more responses but I think I have the majority of people who will respond, I hope I have enough responses to draw some conclusions…

    What Questions did I ask?

    • What generation of Versys 1000 do you have?
    • What tyres are you running on your Versys 1000?
    • How many miles do you get out of a front tyre?
    • How many miles do you get out of a rear tyre?
    • How would you rate the dry grip of your tyres?
    • How would you rate the wet grip of your tyres?
    • How much did your set (Front and Back) of tyres cost you fitted?

    For all these questions I gave set response’s to make things easier, for tyres I listed the most common ones from the facebook group and added an other box. For mile I broke it up into 1500 mile steps up to 12000 and the rating was between 1 extremely slippery – 5 extremely grippy. Finally for price I put £100 bands and offered an ‘other’ choice…

    What did you learn / find?

    Well the first thing I found was that people are lazy and don’t read, nor are they naturally constructive. One of the first comments I received on my post where I shared the survey being “Crap survey it doesn’t list my tyres” when my post had included an invitation to add tyres I had missed… but my favourite responses are the ones where people have used the ‘other’ option on price to enter values in different currencies because they couldn’t be bothered to convert. I suppose I should have expected this as people will always find a way to make things harder than needed.

    However after these we find some interesting pieces of information…

    1 | What generation of versys is most common?

    I was surprised to see that the second is the most common I was expecting it to be a fair chunk but not 55.9%, I was also intrigued by the relationship between 2019 SE and Standard models. It would maybe be interested to survey the 2019 owners again and see how many SE owners have had suspension issues or use all of the additional electronics and how regularly, as when buying my Standard 2019 bike i figured I didn’t need the features and the electronic suspension was just another thing to wrong… but that is a subject for another time.

    2 | What tyre is model is most popular?

    Before I posted the survey to the Versys Club page the Michelin Road Pilot 5 was around 30% and Metzeler Roadtec 01 around 25% changing to this after… These are often the tyres that I had mentally noted got recommended and I was expecting some outliers but I wasn’t expecting either the number / variety nor was I expecting the Bridgestone T31 to be so popular. This leads me to wonder if the distribution varies versus the gen e.g. people with older gen’s had stuck with older model tyres because they knew them and were happy?

    It seems that there are no Gen 2 riders with Road Pilot 4 GT’s and only one with the standard 4’s, where as there are a lot with the 5 and 5 GT. Gen 1 riders seem to be pretty inconclusive and Gen 3’s it looks like most that have replied are still on stock T31’s or Road Angle GT2’s.

    3 | What mileage do people get out of their tyres?

    Note that I gave the option for ticking if you have not yet gone through a full tyre, for these chart’s those and blank responses were filtered out.

    4 | How grippy do people think their tyres are?

    Scale of 1 to 5, 1 being extremely slippery, 5 being extremely grippy.

    Although this shows us that no one has rated any of these tyres as a 1 for either dry or wet and that the majority of people rate their tyres as extremely grippy in the dry and just below this in the wet it doesn’t show much more. If we look at these rating versus the tyres:

    There are some interesting data points, if we for instance compare the Metzeler Roadtec 01, Roadtec 01 HWM and Roadtec 01 SE then the variance may indicate that we do not have enough respondents to draw a solid conclusion.

    Note I have ridden with both the Roadtec 01 HWM and 01 SE on the rear of my bike and would rate the dry and wet grip as 5 whilst the bike still has the HWM front tyre on. Which is suprising considering I was riding in Wales in December in the wet at temperature below freezing at times. This unfortunately leads me to judge that for the most part given how close all the tyres are that this data is not particularly significant and that for this to likely work we would need all riders to have a baseline from which to rate.

    5. | How much are a set of tyres costing?

    This table shows that for majority of people a set of tyres is costing between £200 & £300, I would like to know how someone is getting a set of T31’s for less than £100 and where I can get that deal… Interestingly if we look at the most popular tyre the Michelin Road Pilot 5 / 5 GT (combining them as derivatives in this case) then the majority of people are paying £200 – £400 a set, raising the question of from a mileage and grip point of view given some of what we have seen above are they worth that pice tag?

    Summary

    If we look at our 5 most popular tyres and there front and back mileage and cost it is difficult to draw a clear consensus, part of this is down to the way I structure getting the data. Maybe I should have asked for values and had asked people to put in costs / mileages as numbers.

    However the data for the top 5 ignoring their variants such as the GT and HWM, there are a couple of thing I think we can summarise but very much from a visual / personal judgement of the data.

    • All of these tyres seem to inspire relatively good confidence in the wet, with the Micheline Road Pilot 5 and Metzeler Roadtec 01’s being the top scorers with no one putting them less than a 4 in both wet and dry conditions.
    • Front and Rear seem to get around the same mileage, this is surprising as from my experiences and those of my direct biking friends front tyres seem to last longer than rears.
      • Could this be because people are always changing them at the same time?
      • Could they be changing them at the same time because they are switching models?
    • Mileage wise looking at the above more as a heat map given the variance in responses, it seems like all of these tyres should do at least 6000 miles,
      • T30’s it seems you should expect between 6500 to 7500
      • T31’s it seems you should expect around 10500
      • Roadtec 01’s it seems you should expect around 5000-7500
      • Road Pilot 5 it seems you should expect between 7500-9000
      • Road Angel GT2 it seems you should expect around 6000
    • Price versus performance it seems £200-£300 is the sweet spot, it seems a fair number of people are paying for that confidence in grip with both the Metzeler and Michelin having customers paying between £300-£400.
      • Note one thing I have notice is that both the Metzeler and Michelin have dropped in price, I was quote around £330 about a year ago for either where as now I can find them both for around £260.
    • Bang for buck the T31’s win with them being cheaper and getting higher mileage however you are sacrificing confidence in all weathers and that is where the Michelin’s seem to be the next best offering. It would also help to have some more data points here.

    A couple of things to consider, this data set is limited and skewed towards 2nd Gen riders, there is also a skew in the number of Michelin Road Pilot 5 riders that could be pulling the data off to one side.

    It’s been interesting to take a look at the data and I will leave the survey open, maybe running another more detailed one in future.

    Personally it has changed my outlook a little, the original Bridgestone tyres for me supplied on the bike did about 7300 miles both front and rear, I then changed to the HWM Roadtec 01’s and they were a significant improvement in terms of confidence in the bike in all conditions.

    I then got about 6500 miles out of the rear before changing, I could have probably squeezed 7000 miles but although they still felt great I didn’t want to risk it after getting caught short on the original Bridgestone’s… I found the threads… Right now the front is getting low at ~ 10,000 miles and I will change that out for another Metzeler Roadtec 01 especially now the price is dropping.

    However I ride in all weathers, am 6ft 2″ 24 stone, often ride with pillions or a load on and at a high pace down poor quality roads. So for me I don’t want to change the tyre and risk finding myself in a bush or ditch for lack of the confidence / grip the Metzeler have. That said I will be interested to see what the reviews on the new Bridgestone T32 are like.

    If I were to switch away from the Roadtec 01’s it would be to the Michelin Road Pilot 5 GT’s or if I continue to do high mileage and they have good reviews I might try theT32’s. There is a part of me that would love to have some form of taster day for tyres to justify if the change in grip/profile is something I am happy with and could ride with to increase the mileage as I would love to get 10,000 out of both front and rear…

  • Raspberry Pi Internet Speed Monitoring

    Raspberry Pi Internet Speed Monitoring

    TL:DR – Raspberry Pi Zero + Cheap Ethernet Adapter = 4Mbit/s, Raspberry Pi 3B Ethernet = 82Mbit/s, Don’t trust router USB ports and no one seems to make an easy off the shelf tool for measuring your home broadband speed.

    Warning if you have been reading my other posts and are not technically minded/interested in tech this post probably isn’t for you and you might want to skip it.

    High Wycombe is in that wonderful belt to the west of London where all the tech companies are based, thus, despite the dull grey colour that you would use to describe High Wycombe to a visitor it is expensive to live here. It is actually in terms of quality vs cost worse than west London in my opinion, I can only assume it is because just five minutes north/west of High Wycombe you will find the beautiful Chiltern hills. Because of this & despite earning what I would deem a reasonable wage, I have no hope of ever owning a house in this area and chose to live in an average House of Multiple Occupancy (HMO).

    HMO’s appear to be abundant in this area and all have the same downsides as far as I can tell, no matter how good the pictures look; kitchen to small, no communal area’s other than the kitchen, mould issues and having to pay for the washing machine and tumble dryer in coins!

    However I digress, back in September the old company that managed at the property I live in decided that the BT Broadband that had been struggling to give a consistent 20Mbit/s would be replaced by a Virgin Media Business connection. This was excellent however when they did install it they failed to take into account the size of the house and existing network architecture, which has lead to some issues.

    The most notable is that the Virgin Media router/modem was installed in the kitchen, in the middle of the house, as a HMO every door is a fire door and has an auto closer on it. In addition to this the there is no physical connection from the Router to the CAT5E ports in all the rooms. Resulting in my NAS and some other equipment became dark, the 5GHz struggling to make it out of the kitchen and the 2.4GHz is taking the majority of the load barely reaching the other housemates at the back of the house.

    In addition to the wireless coverage within the house being troublesome, we have been seen serious dropouts in incoming speed, where at time I have struggled to get 1MB/s download speed. This lead me to wondering how can I help the new management company that took over in December sort out these issues and get the right information to them to pass to Virgin.

    I wanted to measure the speed coming into the building because we already know how to fix the Wifi and Ethernet connection issues. Thus to take the variance of WIFI performance out of the speed measurement I figured the best approach was to measure using a device connected directly to the ethernet of the Router.


    Approach 1 – Raspberry Pi Zero with USB Ethernet Adapter

    A quick google found that there was a library for interfacing with Speedtest.net’s CLI, and that this could be easily set up on a Raspberry pi. The logic behind choosing a zero and ethernet adapter was thus:

    1. A Raspberry Pi Zero + Ethernet Adapter were cheap ~ £10
    2. I didn’t need a display out on it so why the low processing power
    3. Low power draw meant I could likely power it from the USB port on the router.

    A side bonus that I had found in looking at the articles for what I wanted to do was that I had found a new way to talk / setup a pi headless. I have been playing with Pi’s for a couple of years and had never realised you could use a USB to Serial adapter to connect direct and get the terminal over serial. So I ordered a USB to Serial adapter to go with the Pi Zero and Cheap Ethernet to Micro USB Adapter.

    Once they had all arrived it only took me a couple of hours to get it set up and logging to a csv, this is where I realised my failings:

    1. The cheap Micro USB to Ethernet Adapter was despite being advertised as USB 2 only really USB 1.1 and the maximum speed I could measure over it was about 4Mbit/s. Googling the chipset found plenty of article explaining and giving realistic speed achievable with other chipsets / dongles. A maximum on the Pi Zero being Pimoroni’s adapter (out of stock) @ 96Mbit/s
    2. The USB port on the back of the router seemed to supply no power what so ever and therefore I still needed a power brick plugged in somewhere to supply power to the Pi.

    So quickly adapting to over come this I moved to a second approach.

    Approach 2 – Raspberry Pi 3B

    I remembered that I had a Raspberry Pi 3B not currently in use and that this has a proper ethernet port built on and thus maybe this would be a better solution, this was surprisingly easy to set up as I was able to just move the MicroSD card from the Zero and dig out the correct PSU and away I went. The new measurement system was up and running.

    I then did some tweaks for how often it was measuring and how I would access the data setting up the CSV in an Apple Share so that it was easily accessible from my MacBook on the WLAN.

    The internet wasn’t running at full pelt when I set it up and Virgin had admitted to doing engineering work explaining that there may be network speed issues. Thus I have left it running this last week, below is the headline figures (It’s wouldn’t let me attache the raw CSV or TXT).

    What’s interesting about this is that the max speed I was able to measure was 82Mbit/s, theoretically the Ethernet on the RPi 3B is 100Mbit/s capable. Now I knew from searching the web whilst having the issue with the Zero that it was unlikely I would get the full 100 but I was hoping to get 96Mbit/s.

    This solution at least for now tells me enough to know when Virgin are really struggling to give the 150Mbit/s plus that I suspect is being paid for, the Median currently being 64Mbit/s and there often being times when it is down in the 40’s. However it would not show me issues/performance above the 82Mbit/s which does skew my data.

    Approach 3?

    Thinking about what a solution to this would look like… This evening I sat in the kitchen and did a speed test from my phone connected to the 5GHz wireless and got speeds in excess of 250Mbit/s. Which is firstly crazy but secondly made me think how common speed monitoring issues must be for several reasons:

    • Most people when checking speed are using the available device, there phone maybe there laptop and most likely wireless either 2.4GHz or increasingly 5GHz.
    • In a modern house the number of wireless devices can greatly change / the load can vary.
    • You are reliant on using third party servers to test your speed, Speedtest.net or Google or others.
    • In most cases there is no direct utility built onto the router to check internet speed or log it.

    This last one is in some circumstances becoming not true, from my own personal experience I have installed Google Wifi in another house and that itself performs daily checks on the speed being received. But that is over £300 of routers… Given that most ISP’s in the UK are now making some form of Ofcom based promise on their performance it would seem logical to me that they would want to make it easier to be clear on the speed to a given house.

    I also spent a few minutes looking for solutions to see if anyone had developed a product for this specific purpose, a small device that you plugged into the back of your router. That say ran a little web server and you could go to it’s address on your local network or an online page and see your speeds plotted over time, something like this that was sub £50 would be worthwhile in a lot of situations especially when dealing with ISP’s failing to meet their promises.

    However I could not see any such solutions, in fact I came back round to cheapest / easiest solution to get up to 300MBit/s being another Raspberry PI. If I had for instance the RPi 3B+ it would have 5GHz wifi & Gigabit Ethernet which would enable measuring speeds up to 300MBit/s, it is still hampered by the USB bus being used to connect the ethernet. Or a RPi 4 which has 5GHz wifi and a Gigabit ethernet, reports say it is capable of around 900MBit/s on a wired connection.

    Other than this my only other method (once the Ethernet port in my room is back alive) is a gigabit ethernet port on one of my desktop machines, though this is a power hungry and wasteful way to measure the speed of the internet in a house…


    Final Thought

    The QA Engineer in me looks at my approach and identifies these key areas where I failed to correctly come up with the requirements and look at the details for what I wanted to achieve.

    1. What is the Value you are expecting to measure and why?
    2. In order to measure something you must first have a measurement device that can exceed the value you are expecting to measure.
    3. Always consider a system or flow diagram down to the lowest level you can with the knowledge you have
    4. Everybody / Everthing lies

    If I had thought further about items I could have identified that I needed to measure up to ~ 300MBit/s that a raspberry pi zero wouldn’t be able to nor would any of the hardware I have laying about (except a full size computer). By considering the flow diagram I might have noted the possibility for the USB bus to being a limiting factor in the architecture of the test hardware. Finally if I had followed Dr Gregory House’s golden rule I wouldn’t have trust the listing for the USB to Ethernet adapter…

  • YBR125 Project

    YBR125 Project

    I always have had several projects of some description on the go, whether they be small electronics (ESP32, Arduino etc.), 3D printing or slightly larger; such as a classic car in pieces. I am also that guy that people come to know as a car/bike guy and they random ask if I am interested in old vehicles, not because I often need a vehicle myself but because I will take opportunities to get bargains ready for friends and family when they find themselves in need. (I like wheeler dealing and always find better bargains for others than myself)

    The Clio I got for my younger brother at a steal from a colleague who was leaving us and moving back to Italy
    Rover 45 I got off another colleagues mum who was giving up driving, it has now been with another colleague for over a year commuting in and out of London.
    Olive the Imp on the car Rotator I built to be able to work on it more comfortably, it now needs a lot of rust replacing with solid metal.
    The YBR the day it arrived at my Garage

    Which brings us to August this year when my younger brothers partner informs me that as a surprise for my brother for her birthday she is going to do her CBT. He has been riding for about 10 years and she often goes pillion with him but thinks she might enjoy it even more if she had her own bike. This was rather fortuitous as 48 hours earlier Owen, a good biker friend, had made me aware that his mothers old YBR125 was once again up for sale, and he just needed it gone from his garden.

    I have known Owen and his twin brother Patrick since I started riding having met them at the old Southampton motorcycle club, ever since we have all been friends as a little circle of bikers. They are good lad’s to know in a storm, as it were, being the first ones round to lay in the dirt with a spanner when you’re really in the shit and you need a vehicle running the next day.

    The YBR in question was their mothers which had been purchased nearly new back around 2009, she didn’t take to biking so it sat in their garden. Getting regular MOT’s for a while and being used as a backup bike when one of the lad’s bikes was off the road. That was until about 4 years ago when it stopped wanting to run properly…

    At the time they had diagnosed the fuel pump a not uncommon issue on these bikes, and had ordered an aftermarket replacement. A sunny Sunday I just happened to be round there catching up whilst they replaced it in the garden, however after replacing it the bike would now start but didn’t want to remain running. After I had left another issue had been theorised with the TPS after some static measurements but it had never been fixed.

    As with so many little projects like this it sat for a further couple of years before his mother was happy to part with it for a sensible figure for such a project and was due to go to another friend in the group, however after a failed attempt to collect it in the back of an estate car and then to further collect it his loss was about to be my gain.

    I took a look at the bike in it’s gardened state half the panels off and various things randomly disconnected, a collection of bolts lay in a side panel and a top box elsewhere in the garden. Owen told me the classic line of “It just needs a new battery and starter solenoid, then it should be had to get running”… I looked at it and knew that it wasn’t in terrible condition and had much life to give but also any number of things could now have become wrong with it after it hadn’t been used for the last 4 or so years, not being in the position of needing the bike leaves you with a clear focus. To me the risk level of this project and what it might need / cost and what it’s worth once running made it clear that I needed to get it cheap, £150 later and a elbow bump and it was mine.

    The next challenge was collecting it, earlier in lockdown Ryan another mate within the biker group (he is in the process of trying to get his license) had been unlucky and been made redundant. However in a stroke of luck he had found a new calling as a motorcycle mover – Transportmybike – a few messages and a sweet mates rate deal was done to get the bike from Chandlers Ford up to my garage in High Wycombe.

    Knowing that the starter solenoid and battery were definitely gone, I got those on order straight away along with a Haynes manual so that i would have them there ready to further diagnose when the bike arrived. I am pretty handy at most things but from experience if it is available it always pays to have the right information to compare to hence the Haynes manual.

    After fitting them I had an FI system error code flashing on the engine management light, looking at the connections that were loose and the state of them I was note surprised. A little contact cleaner and few cables reconnected and that error was gone though it took me longer to realise the fuel pump connector was not connected than I would like to admit. No remaining error codes and the bike now cleanly cranking but not starting the real troubleshooting would need to begin.

    I checked the oil and a few other basic things with my father being a useful extra set of hands, with a little break cleaner in the bore the bike fired into life. It was possible to get it to run after letting the pump prime a few times but it would never continue and would not rev. Given the bike had been sat and there was signs of rust around the petrol tank inlet the prime suspect was dirty fuel of some sort causing issues and not enough fuel getting through to the injector.

    The fact that it had fired and run was enough to give me confidence to get on and order the rest of the bits I figured it needed to be fresh and ready to go back on the road. So we proceeded to de-rust the tank and whilst I was waiting for that and the new tank seal to be ready I ordered a bunch of other parts and cracked on with getting them fitted.

    So as it stands:

    • New Starter Solenoid
    • New Battery
    • New Fuel Pump & Filter – Aftermarket
    • New Fuel Pump Seal
    • New Michelin Street Pilot Tyres
    • New front brake pads
    • Brake fluid drained and replaced
    • New DID Chain and JT Sprockets
    • New front left indicator
    • Tank de-rusted

    And the bike still didn’t want to run and keep running! So I took a step back and went back to the troubleshooting and now have a new likely candidate for the cause of the non running. My workings as it were:

    AIR

    The air filter is clear and has no problems passing air, I have had the throttle body and injector out and there is nothing restricting the flow to the bore.

    Spark

    I have removed the spark plug and cranked over the engine to check for a clean clear strong spark, no issues seen however I had a new plug to go in which also has been tested and fitted without showing an issues sparking. However this does not stop there being a timing issue as the spark timings are controlled by the ECU.

    ECU

    I have no way to establish that this is good or bad at at current however it is not giving any error codes and I have checked the performance of these sensors/voltages against the values in the Haynes manual:

    (Note that for most of these sensors even if they were flashing error codes the bike should start and consistently run)

    • Throttle Position Sensor – (Previous suspect from Patricks investigation – there was a concern over this jumping value suddenly causing the ECU to kill bike but I have not been able to replicate this.)
    • Air Intake Pressure Sensor
    • Air Intake temperature Sensor
    • Injector Impedance
    • Injector Voltage Feed

    Most of these tests require the Throttle body to be connected to the bike and powered, particularly the TPS as it uses some electromagnetic field to detect position. Testing these took the longest as its not easy to get a good electrical connection on a sealed connector, in the end I resorted to sharpening an old set of Multimeter probes so they would cleanly pierce the outer insulation of the cables and get clean measurements.

    Compression

    I have misplaced my compression tester however a finger over the spark plug whole indicates good pressure and given there is enough compression to get it to start it is unlikely that the rings etc have any issues. It is still possible that this could be an intermittent sticking valve but it is unlikely given the behaviour seen.

    Fuel

    It’s worth noting that the investigation for some of these areas and double checking has taken place over a couple of months, often checking certain things more than once. What is difficult is that some of these items the specific test is not easily possible either single handed or without specialist equipment.

    I have removed and cleaned the injector and confirm that it is fires into a loose pot, however I have no reference for what the exact spray pattern or amount of liquid should be.

    I have also disconnected the hose from this and pumped directly through the pipe into the pot. This is the smoking gun that I have so far missed, my prior experience is with gravity feed non fuel injected vehicles. I am not used to expecting tones of pressure and I figures as I did have fuel there and it’s a small CC bike surely it should run even if not right.

    This assumption may be my failing as checking the Haynes manual and some online sites I note that there is a fuel pressure regulator and it is built into the setup inside the tank. This should give 35 PSI however testing this is easier said than done.

    Diagram of the system:

    However now I look at it it would seem clear that the fuel coming out of that pipe is unlikely to be at 35PSI and that when the pump re-primes it doesn’t seem to take very long (suggesting the regulator maybe blocked with rust in some way and it is getting up to pressure in the wrong section). Given I have replaced the pump and the filter, and these had been replaced in the first garden session originally 4 or so years ago that really only leaves the regulator and hoses as being the remaining parts.

    Therefore I have ordered a second hand hose and will swap this first (unlikely but just in case) then cut it in half to enable me to make a hose with which I can measure the pressure coming from the regulator. If this is low then the tank will need to be drained and the regulator inspected, the catch being here that Yamaha only sell the pump as a complete assembly for £270 that includes the fuel level sensor the regulator, pump and filter.

    There is no way to get the regulator on it’s own and I have already paid once for a new pump and filter… this leaves the only cost sensible option as finding a suitable second hand pump complete unit on ebay.

    My diagnoses is not infallible however if it is not this then that really only leaves things like the ECU, to really diagnose any further I would likely need a known running donor bike that I could swap parts between to confirm what was wrong.

    So that brings you up to date, hopefully I will have some time over January to test this theory and either confirm or deny a diagnoses. I had hoped to have had this bike done for October however as long as it is running and ready for the new season in April it will serve it’s purpose.

    Current Total£528.85ReceivedFittedNotes
    Purchase Cost£150.0011
    Moving Cost£55.0011
    Haynes Manual£12.6911
    Battery£25.0011
    Starter Solenoid£15.0011
    Fuel Pump Kit£22.0011
    Fuel Pump Seal£14.0011
    Front L Plate£5.951
    Rear L Plate£6.991
    Indicators£15.0011
    Front side undertank trim£9.951
    Battery retaining strap£5.99Bought in error,
    it was the toolbag strap that was damaged / missing
    Rubber sheet to make Fuel cap gasket£7.69Didn’t work,
    in the end used rubber grease on the original seal
    Tank to Injector Hose£10Second Hand Ebay
    Service Items
    Oil£7.881
    Spark plug£2.991
    Brake Fluid£4.0911
    Front Brake Pads£12.2911
    DID Chain & Sprocket kit£31.2611
    Tyres£99.0811
    Sprocket lock washer£7.001
    Fuel Tank Derusting
    Bilt Hamber Deox C£15.0011
    Bilt Hamber Surfex HD£2.0011fag packet estimate
    Bilt Hamber Korosol£2.0011fag packet estimate
    Costs spreadsheet not including any tool purchases for the YBR125